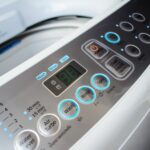
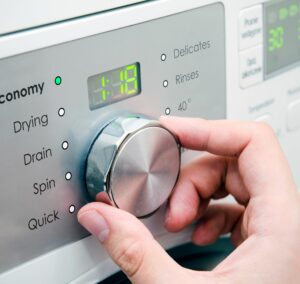
Smart washer-dryers have revolutionized one of the most essential daily household routines: laundry. You can track the progress of your laundry loads from a distance and even change the settings with the press of a few buttons on an app. One part that smart washer-dryers share with traditional washing machines and dryers is the control board.
This component is like the brain of the appliance. When you select specific settings for your washer or dryer, the control board signals to the rest of the machine what to do. While some control boards can be fixed, there are some situations where replacing the control board in smart washer-dryers is necessary.
Replacing The Control Board In Smart Washer-Dryers
You will know that it’s time to replace the control board in smart washer-dryers when the machine fails to respond to the controls on a consistent basis. While the process may seem intimidating, you can use this guide to replacing the control board in smart washer-dryers to get started:
1. Turn Off And Disconnect The Smart Washer-Dryer
For your own safety, the first thing you should do when replacing the control board in smart washer-dryers is to turn off the machine and unplug it from the power outlet. This complete disconnection is the best way to prevent any accidents or damages from occurring during the replacement process.
2. Remove The Top Panel And Dispenser Hoses
With that safety measure out of the way, you are ready to officially start the replacement process by removing the top panel and moving the dispenser hoses of your smart washer-dryer. Use a screwdriver to remove the screws that secure the top panel. Keep the screws in a safe place so you can easily access them when it’s time to reassemble the machine. Most top panels can be slid toward the back and then lifted off, but be sure to consult the user manual to be certain. As for the dispenser hoses, you’ll need to get them out of the way by marking their original spots with tape, then moving them to the side and securing them with clamps.
3. Remove The Old Control Board
Removing the old control board requires the utmost attention and care. After carefully removing the cover, you’ll unscrew the screws that are keeping the control board in place. Don’t forget also to press down the locking tabs so the removal process can be done with ease. At this point, remember that each smart washer-dryer is manufactured differently, so you’ll need to check the manual to ensure you’re removing the old control board correctly.
4. Install The New Control Board
For this step in replacing the control board in smart washer-dryers, you’ll need to be just as careful as you would with removing the old control board. Most user manuals should have a guideline as to how to position the new control board. Once in position, secure the board with the appropriate tabs and screw the protective cover over it.
5. Reassemble The Top Panel And Dispenser Hoses
Now that you’ve replaced the control board, you can unclamp the dispenser hoses and put them back in their previous position based on the tape you placed earlier. Then, you’ll carefully reassemble the top panel of your smart washer-dryer and screw it back on securely.
6. Reconnect And Test The Smart Washer-Dryer
The final step in replacing the control board in smart washer-dryers involves testing the effectiveness of the new control board. You’ll start by reconnecting the machine to the power source. After turning it back on, you’ll add a reasonable-sized load to the smart washer-dryer and run a cycle. If the machine is accurately responding to the controls, you’ve successfully completed this task.
We Will Replace The Control Board Your Washer And Dryer!
This guide to replacing the control board in smart washer-dryers will ultimately be helpful. If you don’t have a smart washer-dryer, these instructions can still be applicable to traditional washers and dryers. Of course, we understand if you’d rather leave this task to the professionals. If you happen to live in Miami, all you need to do is contact us at Appliance Repair Miami. Our team will set your laundry appliances right in no time.


